🍡 Kawaii Snacks: The Adorably Delicious Treats You Didn’t Know You Needed
So you’ve been scrolling through Japanese food content at 2 AM again, haven’t you? Same. And now you’re absolutely convinced you need to make tiny, ridiculously cute snacks that look like they belong in an anime bento box. Well, good news — you’re not wrong, and you’re in the right place. These kawaii snacks are equal parts adorable and delicious, and making them is way more fun than whatever else you had planned today. Let’s get into it.
🍬 Quick Look at the Recipe
| 🎯 Skill Level | ⏱️ Prep Time | 🔥 Cook Time | ⏳ Total Time | 🏆 Result |
|---|---|---|---|---|
| Beginner-Friendly | 25 mins | 15 mins | 40 mins | Peak Cuteness |
| 🍽️ Servings | 📋 Course | 🌏 Cuisine | 🔢 Calories |
|---|---|---|---|
| 12–15 pieces | Snack / Dessert | Japanese-Inspired | ~120 kcal per piece |
🌟 Why This Recipe is Awesome
Where do we even start? First off, these kawaii snacks require zero professional pastry skills. You don’t need to have trained in Tokyo for three years — you just need functioning hands and a vague sense of fun. The shapes are forgiving, the colors are customizable, and even if your bunny looks more like a potato with ears, it’s still delicious and still, somehow, cute.
They’re also wildly customizable. Want to make pastel pink strawberry ones for a birthday? Done. Going for a Halloween vibe with black sesame? Absolutely. These little guys adapt to your mood, your occasion, and honestly, your pantry situation. FYI, they also make incredible gifts — wrap them in a little box and suddenly you’re the most thoughtful person anyone knows.
Oh, and they’re genuinely fun to make. Like, actually fun. Not “fun” in the way that spending four hours making croissants is technically a “fun weekend project.” This is real fun.
🛒 Ingredients You’ll Need
For the Dough/Base:
- 1 cup glutinous rice flour — the MVP of chewy, stretchy goodness
- 2 tbsp sugar — just enough sweetness, don’t go rogue
- ½ cup warm water — warm, not boiling, please
- Food coloring (pink, yellow, green) — the whole point, honestly
- 1 tbsp cornstarch — for that smooth, silky finish
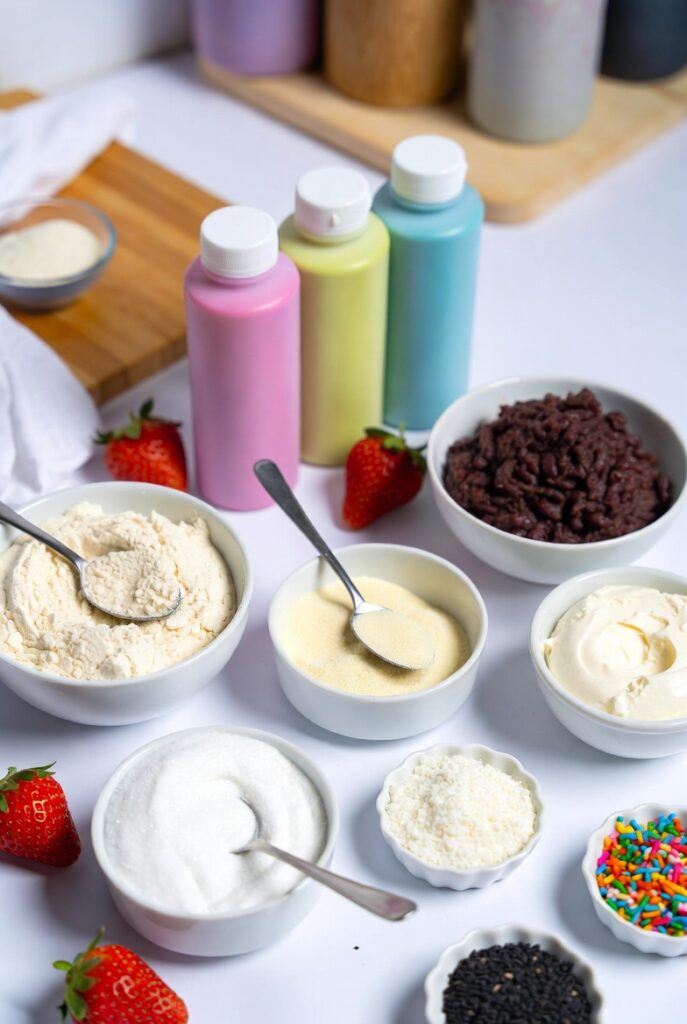
For the Filling:
- ½ cup red bean paste (anko) — classic, iconic, non-negotiable
- OR ½ cup strawberry jam — for those who went a different direction in life
- OR ½ cup sweetened cream cheese — the chaotic good option
For Decoration:
- Black sesame seeds or edible markers — for drawing tiny faces
- Powdered sugar — for dusting and making things look fancy
- Sprinkles (optional) — because why not
🔧 Recommended Tools
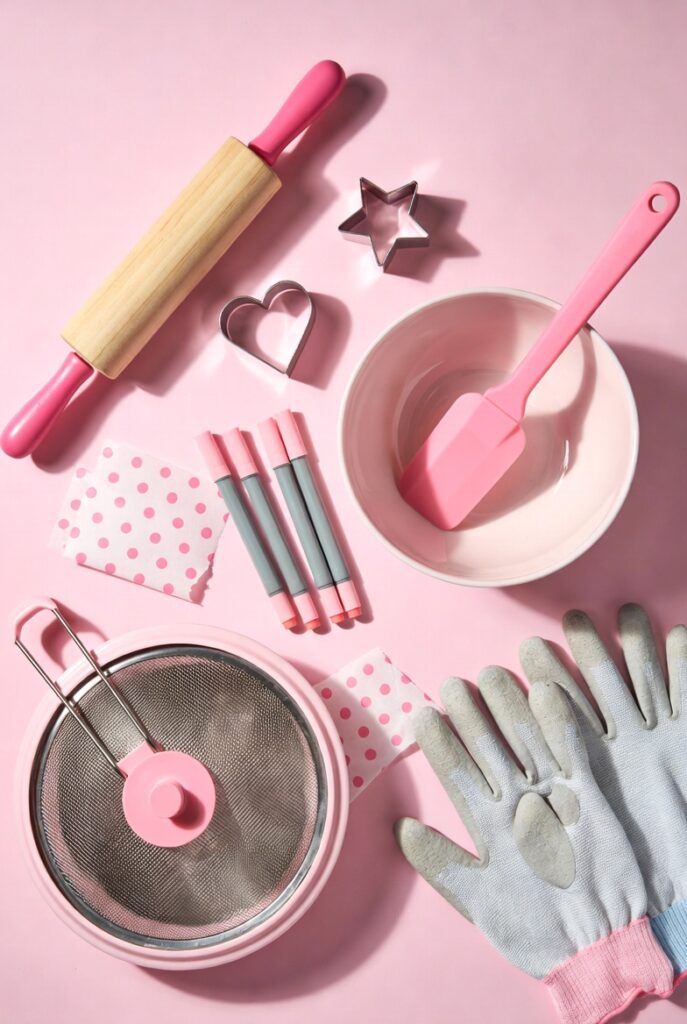
- Mixing bowls — at least two; organization is a vibe
- Steamer or microwave-safe dish — for cooking the dough
- Small rolling pin — or a smooth cup works in a pinch
- Cookie cutters (star, heart, circle, animal shapes) — this is where the kawaii magic happens
- Toothpicks or edible markers — for tiny adorable faces
- Parchment paper — non-stick is your best friend
- Food-safe gloves — optional, but keeps things clean and professional-looking
📝 Step-by-Step Instructions
- Mix the dough. Combine glutinous rice flour, sugar, and cornstarch in a bowl. Gradually add warm water and stir until you get a smooth, lump-free dough. Divide it into portions based on how many colors you want.
- Color your dough. Add a few drops of food coloring to each portion and knead until the color is fully even. Start with less — you can always go darker, but you can’t un-neon your dough.
- Cook the dough. Place each colored portion in a microwave-safe dish and microwave for 1–2 minutes, checking every 30 seconds. Alternatively, steam for 10–12 minutes. The dough should look slightly translucent and feel soft but not sticky.
- Cool slightly, then shape. Once cool enough to handle, roll small portions into flat circles about 2–3 inches wide. Don’t skip the cooling step — burning your fingers is not part of the recipe.
- Add the filling. Place a small teaspoon of your chosen filling in the center of each circle. Fold the dough over and pinch the edges shut firmly. Roll gently into a ball or use cutters to shape.
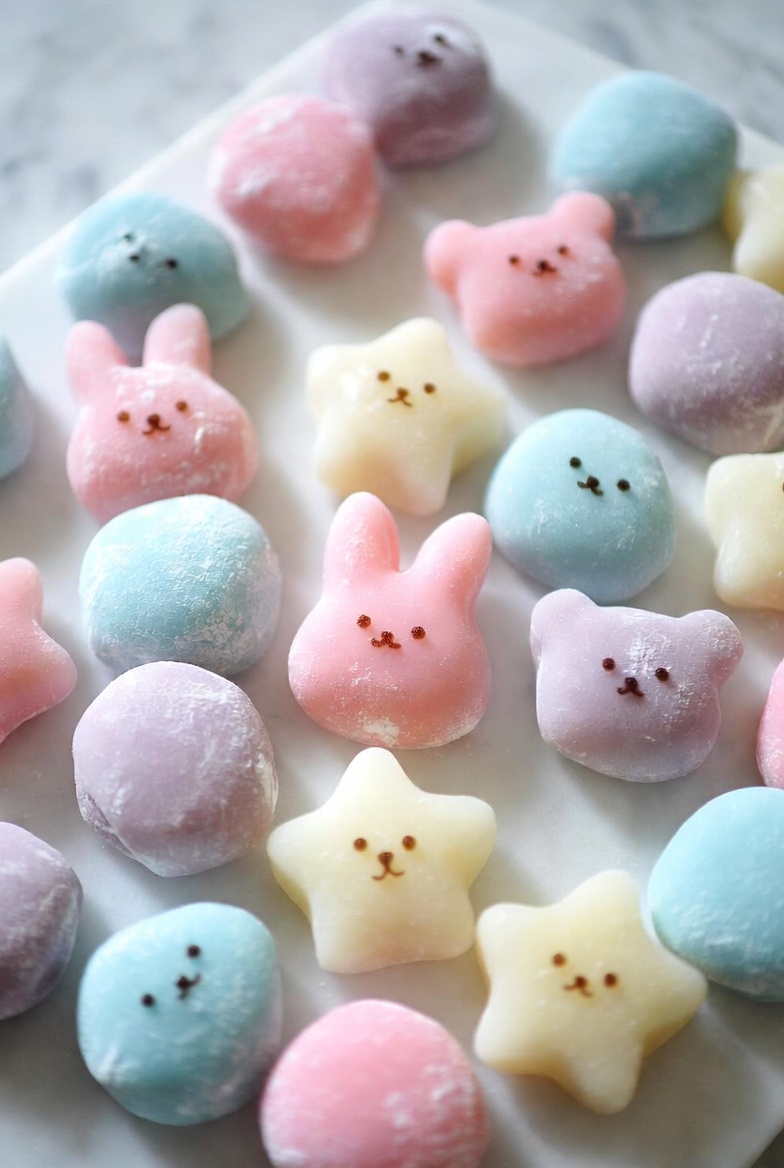
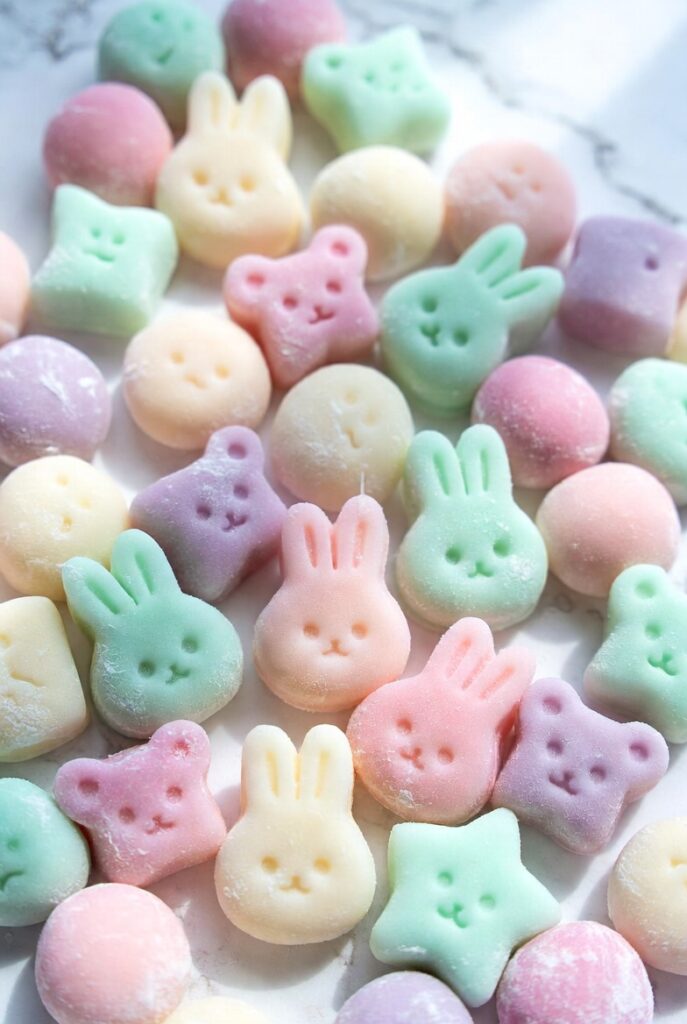
- Decorate! This is the fun part. Use sesame seeds for eyes, small cutouts for ears, and edible markers for expressions. Give them tiny smiles. Give one a frown for character. Live your truth.
- Dust and serve. Lightly dust with powdered sugar to prevent sticking and add that dreamy mochi-shop aesthetic. Arrange on a plate and try not to eat them all immediately.
🏷️ Nutrition Facts
Serving Size: 1 piece (approx. 35g)
| Nutrient | Amount |
|---|---|
| Calories | 120 kcal |
| Total Fat | 1.5g |
| Saturated Fat | 0.5g |
| Cholesterol | 0mg |
| Sodium | 15mg |
| Total Carbohydrates | 26g |
| Dietary Fiber | 0.5g |
| Total Sugars | 9g |
| Protein | 1.5g |
| Calcium | 4mg |
| Iron | 0.3mg |
Values are approximate and vary based on filling choice.
🎨 Recipe Variations
- Matcha Kawaii Snacks — Swap green food coloring for actual matcha powder mixed into the dough. Fill with white chocolate ganache for a flavor combo that’s dangerously good.
- Fruity Pastel Version — Use freeze-dried strawberry or mango powder for natural coloring and flavor. Fill with fresh fruit cream for a lighter, summery twist.
- Chocolate Lover’s Edition — Add a teaspoon of cocoa powder to the dough for a brown base, fill with Nutella, and decorate to look like tiny bears. Pure chaos. Highly recommended.
🍽️ Recommended Ways to Serve
- Bento-style presentation — Arrange in a segmented bento box with fruit, crackers, and cheese for an aesthetic snack board that belongs on social media.
- Tea party spread — Serve alongside matcha or hojicha tea for a full Japanese-inspired experience that makes you feel very cultured.
- Party platter — Pile them on a plate, stick in a few toothpick flags, and watch them disappear in approximately four minutes at any gathering.
🧊 Storing and Reheating Guidelines
- Room temperature: Store in an airtight container for up to 1 day. They’re best fresh — the texture starts to firm up over time.
- Refrigerator: Keep for up to 3 days, but let them come to room temperature before eating. Cold mochi = sad mochi.
- Reheating: A quick 10–15 second microwave zap brings them back to life. Cover with a damp paper towel so they don’t dry out.
⚠️ Common Mistakes to Avoid & Fixes
| Mistake | Fix |
|---|---|
| Adding too much food coloring at once — now your snack looks radioactive | Start with 1–2 drops and build up gradually. Patience is a virtue. |
| Skipping the cooling step and burning yourself immediately | Let the dough rest 5 minutes before touching. Your fingers deserve better. |
| Overfilling the center — and it explodes when you pinch | Use a small teaspoon. Less is more, especially here. |
| Dough too sticky to work with — you’re having a rough time | Dust your hands lightly with cornstarch. Problem solved, crisis averted. |
| Making faces that look terrifying instead of cute | Embrace it. Cursed kawaii is still kawaii. |
| Not making enough — everyone eats them all before you get a photo | Double the batch. Always double the batch. |
🔄 Alternatives & Substitutions
- No glutinous rice flour? Regular rice flour can work in a pinch, but IMO the texture won’t be quite as stretchy and chewy — manage expectations accordingly.
- Red bean paste alternatives — White bean paste, lotus paste, or peanut butter all work. Cream cheese with a little honey is also genuinely excellent.
- Natural food coloring options — Beet powder for pink, spirulina for green, turmeric for yellow. Healthier, slightly more effort, equally beautiful.
- No steamer? A microwave works perfectly here. This recipe is very forgiving about cooking method, bless its heart.
- No cookie cutters? Shape by hand. Imperfect shapes have character, and character is what makes homemade food special (and that’s the story we’re going with).
❓ FAQ
Q. Can I make these ahead of time? Ans: You can prep them a day ahead, but they’re genuinely best fresh. If you must make them ahead, store at room temp in an airtight container and avoid the fridge until necessary.
Q. Do I have to use red bean paste? I’ve heard it’s an acquired taste. Ans: Absolutely not! Strawberry jam, Nutella, cream cheese, peanut butter — fill them with whatever makes you happy. This is a no-judgment kitchen.
Q. My dough came out too hard. What went wrong? Ans: It either cooked too long or cooled too much before shaping. Next time, work a little faster and add a tiny splash more water to the dough before cooking.
Q. Can kids make these? Ans: Yes! The decorating part especially. Kids go absolutely feral for drawing tiny faces on things, and this is a great way to channel that energy productively.
Q. Are these actually mochi? Ans: They’re mochi-inspired — similar dough, similar technique, same general energy. Purists might quibble, but purists also aren’t having as much fun as you right now.
Q. Can I freeze them? Ans: Technically yes — freeze before decorating, wrapped individually. Thaw at room temp. The texture changes slightly but they’re still pretty solid. Good backup plan for surprise guests.
Q. Do I need special Japanese ingredients? Ans: Glutinous rice flour is the main one, and it’s easy to find at Asian grocery stores or online. Everything else is totally standard pantry stuff. Very accessible, 10/10.
💬 Final Thoughts
Look at you — making tiny adorable Japanese-inspired snacks like it’s just a casual Thursday. Whether yours turned out picture-perfect or hilariously wonky, they’re going to taste delicious either way, and that’s what actually matters. The kawaii spirit isn’t about perfection; it’s about cute, joyful little moments — and that’s exactly what these snacks deliver.
Share them, gift them, hoard them selfishly — no judgment here. Now go impress someone — or yourself — with your new culinary skills. You’ve absolutely earned it. 🍡✨